How to Make a Buddy Burner

Updated May 07, 2024

How To Make A Buddy Burner

If you're looking for a fun group activity, a challenge to earn a great new badge, or are just excited to add a new survival skill to your repertoire, why not try making a Buddy Burner? With just a few supplies and tools, you'll be cooking in no time!

Supplies

  • 1 empty and clean large-sized can
  • 1 empty and clean tuna can
  • cardboard strips 
    • cut these to the height of your tuna can, and at right angles to the ridges
  • church key tin opener or drill 
    • if using a drill, please remember safety glasses!
  • tin snips
  • paraffin wax
    • the ends of unscented candles or even Crayons will work in a pinch
  • old saucepan or 1 additional clean tin
    • to melt the wax
  • a few wicks or lengths of string
    • these should be dipped in the wax

Instructions

  1. With tin snips, cut a "door" or "opening" in the larger tin on the open end. This needs to be just a little larger than the tuna tin. 
  2. Either use the drill or the church key opener to make vent holes around the top of the larger tin. Make several holes with diameters of 6-8 mm. 
  3. Roll the cardboard strips around one wick and squeeze them into tuna tin to create a coil - the coils need to fit snuggly into the can. Stick the additional wicks between the coils; this is in case you need to light more or one of your wicks goes out - consider these back-ups!
  4. Carefully fill the tuna tin with melted wax - it may be hot, so use caution - allowing it to fill the spaces between the coiled cardboard.
  5. After the wax has set, you are ready to use your new Buddy Burner or store it for later!

How To Use

  1. Place your Buddy Burner on a heat-resistant surface. It will get HOT while you're cooking. We also recommend this activity be done outside in a well-ventilated area.
  2. This is a great time to talk about fire safety. Have a fire extinguisher at the ready!
  3. Light the wick(s). Be patient as your wicks, cardboard and wax catch fire. 
  4. Once you have a flame, gently place the large tin over the small tin. 
  5. Be patient again as you wait for the can to heat up! You can begin to cook once the larger tin gets hot. The top of your Buddy Burner is not a non-stick surface, so remember to use oil, butter or non-stick spray to limit sticking. 
  6. Things to cook over your Buddy Burner - try making a grilled cheese sandwich, fry an egg, or get creative and see what tasty recipes you can come up with. 
  7. Once you're all done cooking, to extinguish we recommend using tongs or oven mitts. Invert the larger tin can and use the cooking surface to press down on the "burner" to smother the flames. DO NOT use water.
  8. Remember, the liquid wax will still be hot. Do not pack up your Buddy Burner until the flame is entirely put out, the surfaces have cooled completely, and the wax is set hard again.

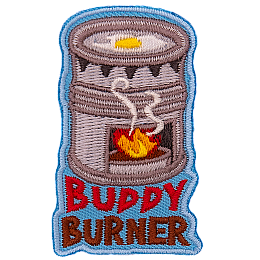
Did you make a buddy burner following our guide? Use promo code BB10 when you place your next order to get 10% off your Buddy Burner Patches!


Alisha Souillet

Alisha is an E-Patches & Crests team member. She is a talented writer and graphic designer. She lives with her husband and son in Red Deer, Alberta, where she spends way too much time reading, crafting, and avoiding housework.


  • Share:
@2024 E-Patches & Crests is a private enterprise not affiliated with Girl Guides of Canada.
This site is not sponsored, endorsed or approved by Girl Guides of Canada or any Provincial Council.
Checkout

Total 0